


Fastest page load speed is one of those key features Webflow is known for. Users tend to stay on the pages that allow them to get the information they want quicker than others. Thus pages load faster, reduce bounce rate and impact ranking factors for the website.
Webflow, therefore takes speed optimizations for pages at their top priority list and introduces innovative features like swap, link preloading and default image lazy load. Moreover an empty Webflow site scores 100% for PC and 85% for mobile meaning the website hosted at Webflow is faster by default.
This guide will explore these key features Webflow has recently released to let you optimize your page loading speed faster than ever and some other related factors to strengthen your control over your site performance.
Why Should You Optimize the Speed and Performance of Your Website?
Semrush clearly states that page load time and performance have key impacts on ranking. The loading time of webpages is important because:
- For higher rankings in mobile and desktops, page load speed is a contributing factor.
- If the website and webpage are slow, it will impact the user experience, and they may not visit your website further.
- The slower the webpage loads, the higher the bounce rate will be. And with higher bounce rates, search engines treat websites badly. As Semrush reports, web pages with 1-3 seconds of load time have a 32% bounce rate. On the other hand, pages that load between 1-5 seconds have a bounce rate of 123%.
How to Measure Website Loading Speed?
For measuring the page loading speed, you should seek Page Speed Insights directly from Google, which includes both lab and real data from the user experience. It helps you see the webpage load speed and related metrics for proper optimization.
There are six main web page speed metrics that you need to know about thoroughly. Only then can you optimize your webpage to perform better.
First Contentful Paint (FCP)
FCP typically refers to the actual time it takes for the first content element to appear on a web page. The FCP score measures the loading speed of videos, images, and texts mainly. A good FCP score is under 1-2 seconds; the faster, the better.
Largest Contentful Paint (LCP)
LCP primarily measures the loading time of the largest content element. It usually includes a header image, a block of text, and videos with larger file sizes. A good score for the LCP should be under 2.5 seconds.
Speed Index
Speed Index seeks how quickly the content on a webpage becomes visually complete. Typically, it measures the loading time for the contents and texts that the audience can see at first on the web page without scrolling down.
A lower speed index score is better. You should aim for under 4 seconds, at least.
Time to Interactive (TTI)
TTI measures the time a web page needs to become fully interactive and responsive to user input. As the page becomes responsive, the visitors can scroll up and down and click on videos, links, etc. So, TTI refers to the time needed for the audience to do something on the webpage.
Google recommends that the best TTI score is around 3.8 seconds. If the webpage becomes responsive in less than 3.8 seconds, it’s even better. Conversely, if the TTI is above 4 seconds, chances are high that visitors will leave the page.
Total Blocking Time (TBT)
TBT measures the contributing factors that link with TTI metrics. Often, these are commonly referred to as "Long Tasks" and are the elements that are required to make the webpage responsive. Ideally, the TBT score should be less than 200 seconds for faster responsiveness of the website.
Cumulative Layout Shift (CLS)
CLS quantifies the unexpected time to be able to click on the "X" button to remove ads for the audience. It measures how fast readers can click on the "X" button and remove ads to see the contents. A study found that a 0.2-second reduction in the click time on the button increases page view by 15.1% and decreases bounce rates by 1.72 times.
Website Speed Measurement Tools
You can use different speed testing tools to measure the load speed of a webpage. It will give you a clear insight into the metrics score and where you need improvement.
1. Pingdom
Pingdom is a simple website for a quick speed test of webpages. You enter your website URL and choose the location from the "Test From" button. As you click on the "Start test" button, it gives you performance insights, including load time, page size, and recommendations for improvement.

2. Google Analytics
Google Analytics offers a Site Speed report to track various speed metrics for web pages. It helps you monitor and analyze your site's performance to know the improvement opportunities.
For this, you need to log in to Google Analytics using your Gmail account. Then, you can access the Site Speed report under the Behavior section of the Google Analytics account. It will show you various speed metrics for your website, including the following ones:
- Bounce rate
- Average session duration
- Pages per session
- Pageviews
- Sessions
- Conversions, etc.
3. GTmetrix
GTmetrix allows you to analyze and monitor your website's speed. It provides a detailed report with recommendations for optimization. You can test from different locations and browsers. To test your website load speed, visit the GTmetrix website.
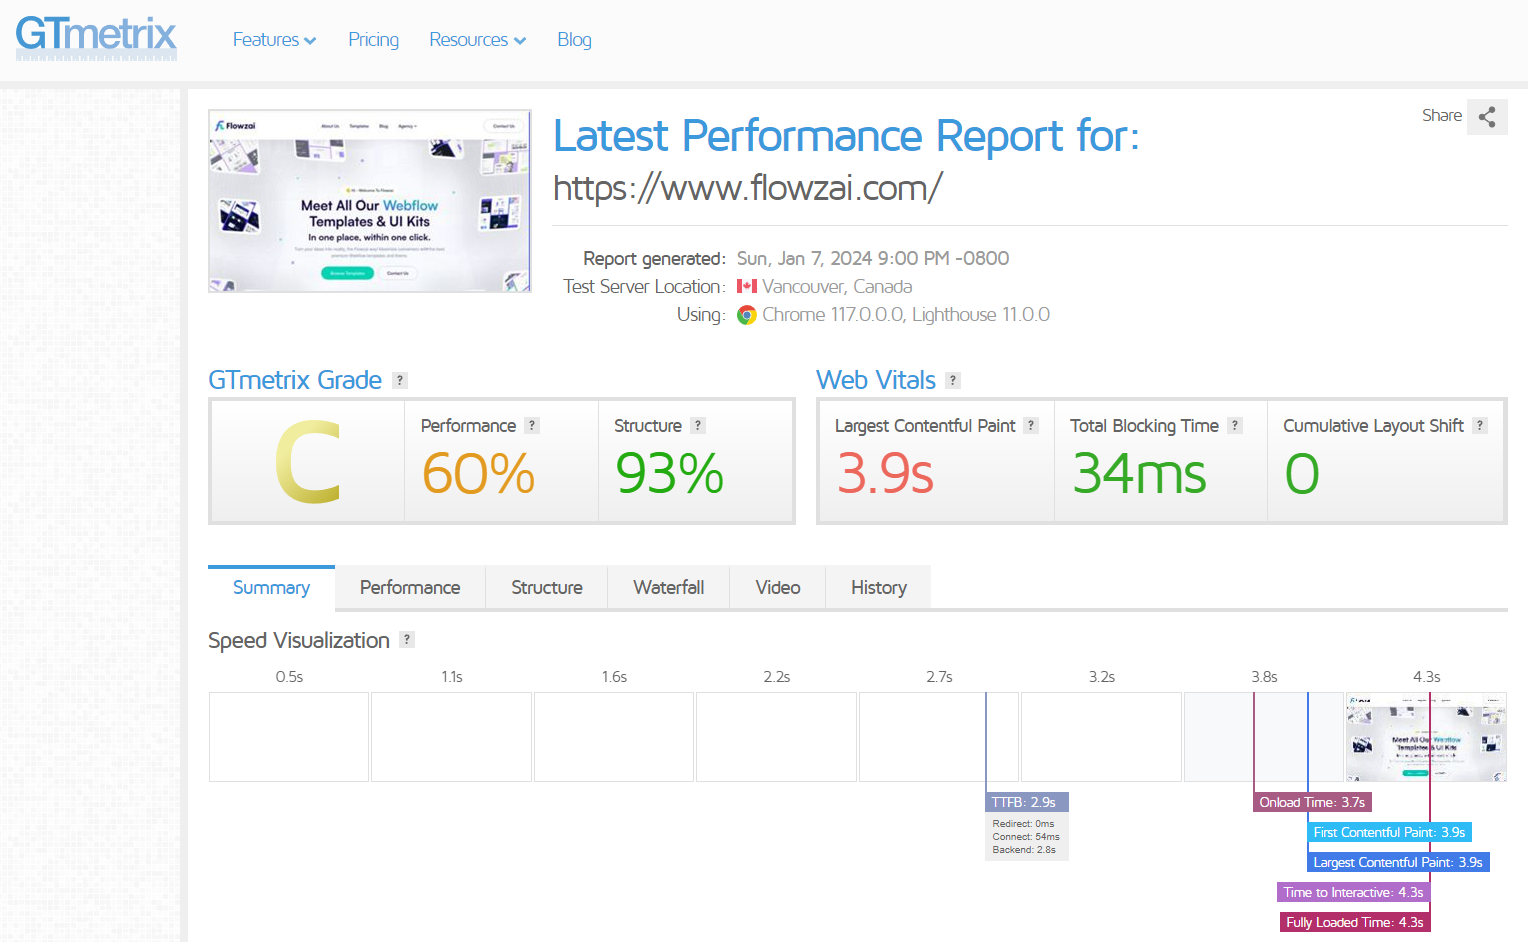
From there, enter your URL and click "Test your site." It will generate a report with performance data and optimization recommendations.
4. WebPageTest
WebPageTest is a powerful, open-source tool with advanced performance testing. It provides insights into various metrics, including filmstrip view, waterfall chart, and more. All you need is to go to the WebPageTest website and enter the website URL you wish to check.
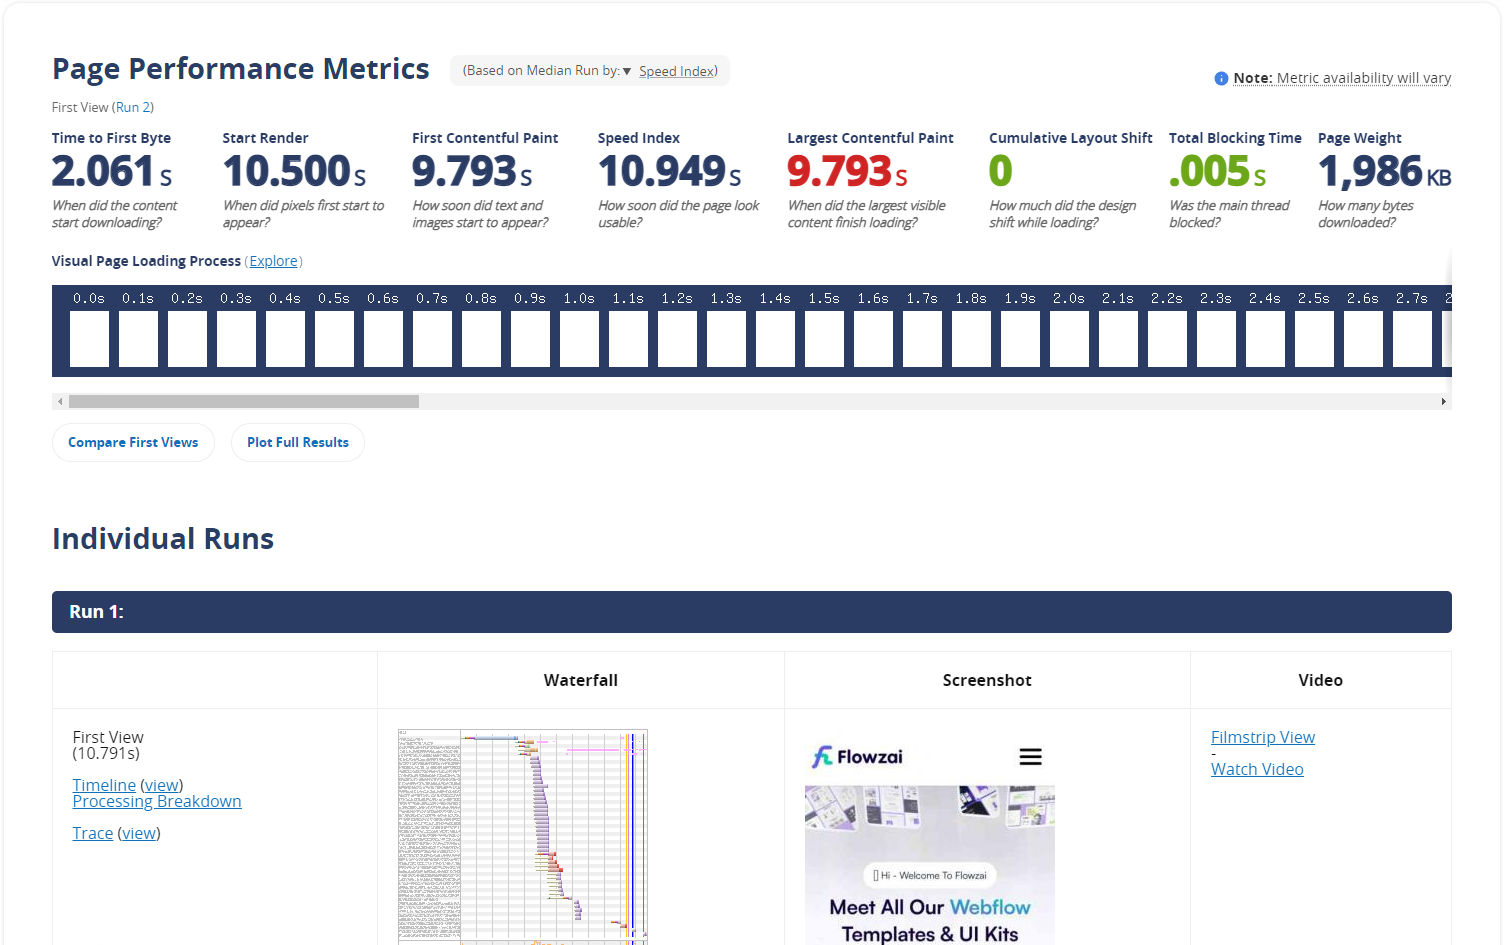
After that, choose test settings (location, browser, etc.) and start the test. You'll receive detailed performance data.
5. Speedtest.net
Speedtest.net is primarily used to measure internet connection speed. However, it can also provide a basic assessment of your website's loading speed by testing how quickly it loads on different devices.
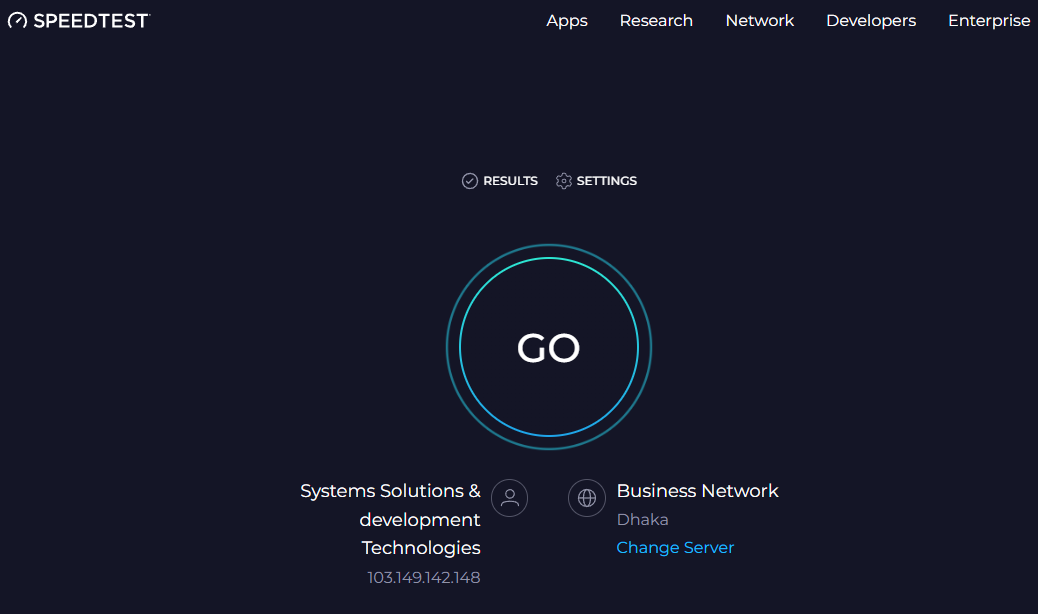
You can easily integrate Speedtest Chrome Extension into your browser and then visit the website for testing purposes. It will give you clear data on the Web Speed in seconds. However, its metrics aren't as detailed as a few other webpage speed testing tools.
Webflow Page Speed Optimizations Tips
Webflow offers a number of features to improve the speed and performance of your website. However, there are also a number of things you can do yourself to optimize your Webflow website for speed. From deferring the scripts to finding the right hosting and server, all play their role in optimizing the website's speed and performance.
Tip 1: Work With Images
Images are often the largest files on a web page. Hence, the more images with higher resolutions you have on a webpage, the longer it takes to load. Also, when you set the webpage image load settings to default, it will load all images at a time. It further slows down the website speed.
The key is to optimize the images without losing their quality. Also, you should use the lazy load feature of Webflow to boost the page load time.
Use Lazy-Load Image Feature
Webflow applies a lazy load for all the images on your website by default. As a result, the images will load gradually as the user keeps scrolling the page. It stops all the images from loading at a time. However, at times, your lazy load function may not work properly. Also, when you migrate from other platforms, you should enable the option for all the previous content and images.
You can do that from the "Lazy Load Image" option, which is in the "Performance" segment. You should find it in the Project Settings of your Webflow website. You can apply the lazy load option for videos, too. It will stop the images and videos from loading immediately, giving the website a thrust to load faster.
Use images in the right format
In general, websites use JPG and PNG formats for the images they use. However, you may also use SVG images, especially for photography images. It ensures that the images have premium quality while you can scale up or down the image size.
Nonetheless, whichever image format you use, make sure the image size is at most 2X of its actual one. Or else it will slow down the webpage significantly.
Moreover, you may use SVG format with a similar image size for all. So, the combo classes will drop and reduce codes in the CSS system. And with reduced CSS, webpages will eventually load faster.
Compress and optimize images
Next, you should compress and optimize all images before uploading them to Webflow websites. It will reduce the file size without sacrificing quality. You can use different image compression tools to optimize and compress the images with lossless quality. A few ones you may choose include:
- TinyPNG
- ImageOptim
- Kraken.io
Once you have compressed and optimized the images, you can upload them to Webflow like you would any other image file.
Use WebP images
WebP is a newer image format with a better compression facility than JPEG and PNG images. Webflow supports WebP images. It means you can convert the previous images of your website into WebP format to improve the loading speed. For this, access the “Media” function from your Webflow visual editor and on the Convert to WebP button.
After converting the images to WebP format, use the image element to insert them into pages.
Tip 2: Work with the Fonts
Besides images, fonts also take a considerable chunk of the website and affect the loading time. As you work with the fonts to reduce their numbers, use Google Fonts and device-specific ones; it will reduce the workload on the webpage. No doubt, it will boost the performance.
Use Device-Specific Default Fonts
Instead of using custom fonts on the website, consider using device-specific default fonts. Hence, the webpage won’t have to load all the fonts. Instead, the webpage will only load the fonts that the device of the user supports.
Primarily, different devices have different fonts specific to them. It includes:
- Windows mostly use Segoe UI
- Macs mostly support Blink or San Francisco
- Android Phones support Roboto fonts
Device-specific default fonts are already installed on most devices. As a result, it will load quickly and consistently. You should select the System UI font family to enable device-specific fonts in Webflow. You can do it with the following steps:
- Go to the “Navigator" icon from your Webflow Designer function
- From the click on the Body" to access the Body Styles
- Now, click on the class from where you can access the Body (All Pages).
- Confirm the selection and change to System0UI from the right side. It should be available in Typography.
As you confirm device-specific fonts, it improves CLS and FID scores. And we all know how important CLS and FID scores are for the Core Vital Report of any website. The report states that:
- CLS score should be less than 0.1 seconds for a good website
- For a good LCP score, your website must load in less than 2.5 seconds
- A good FID score for a fast-loading website must be less than 100ms
And you can improve in these categories with reduced fonts and optimized images.
Reduce the Fonts
Many Webflow websites use custom fonts. If so, websites should try to reduce the number of fonts and variants of each font.
When you use a lot of different fonts, your website has to download each of those fonts. Only then can it start loading the rest of the page, increasing the load time. Hence, you should identify the fonts and their variants for the website. For this, expand the “Font Family Section” from the Text Style panel.
After determining the fonts and their variants, try to remove the maximum ones that need to be more helpful or common. Instead of using multiple fonts for titles and headings, use a single one. Also, set the fonts to "System-UI Font" to reduce the server request.
Also, you can choose the “font display” function and attribute the "Swap" feature there, as Webflow recommends for font optimization. When you enable the "Swap" attribute, the browser uses preload fonts to show the webpage immediately.
Tip 3: Work With the scripts
Scripts also affect the page load times. It is especially applicable if you are using a lot of third-party scripts. Long story short, you should work with the scripts to further improve the user experience. For instance, selective scripts for mobile devices will help the webpage load faster on smartphones.
Use Selective Loading for Smartphone
Mobile browsers aren’t as capable as desktop versions. Hence, mobile browsers work slowly, as Zhen Wang and Lin Zhong found in their study, “Why are Web Browsers Slow on Smartphones?” As a result, scripts will load slowly in mobile browsers.
- Access the “Performance” section from the Webflow Project Settings or Designer.
- Browse to the selective loading option and look for the “Mobile” option.
- It should be on the dropdown menu inside the "Mobile" option.
- There, find the "Add New" button and select the scripts to defer in a mobile browser.
Apply delaying scripts
You can also use custom code to delay the loading of scripts. It will be useful for stopping the scripts from loading that are not essential for the initial loading. You can create custom codes using your favorite coder and add them to the <head> section of the webpage. Then, from there, assign and replace it with the actual script code.
Also, expert website developers suggest putting the script in the "footer" section of Webflow websites instead of the "head" section. You should do it for every custom code of scripts.
For smaller codes, embed them:
Instead of using a script tag each time, you can embed some smaller codes directly into your Webflow websites. It will save time from downloading, locating, and executing the codes every time the webpage loads.
Nonetheless, be careful about embedding too many custom codes. Webflow limits the embedding facility to 10,000 characters in a single go.
Avoid Using Scripts from Third-Party
Third-party scripts considerably slow down websites. Therefore, it is best only to use them if you find the third-party scripts particularly necessary. Even if you need third-party scripts, try to minimize their numbers.
For this, you should find self-hosted alternatives. For example, instead of using Google Analytics, you can use a self-hosted analytics solution like Matomo.
Tip 4: Remove Triggers, Interactions, and Styles That Aren't Needed
During the initial Webflow website creation, we often design many triggers, interactions, or styles. All these designs make the website look aesthetically pleasing. However, over time, you will find that not all of these styles or triggers are necessary.
Thus, it's always a good practice to remove unnecessary triggers, interactions, and styles. You can delete these items from the “Clean Up” function of the panel. For example, you might have a trigger to set a background color on an element. It pops up the color when the user hovers over the element. If you don’t need the effect, simply delete it to boost the load time.
Tip 5: Use Proper CDN, Server, and Hosting
A good server and hosting provider are the keys to good load speed and performance of websites. So, always focus on selecting a reliable hosting and server for Webflow websites. You can choose Webflow Hosting for the best site optimization and performance requirements.
Webflow hosting has the following benefits:
- Amazon Web Services (AS) offers excellent services
- Fastly cloud-computing ensures your content loads faster
- It is HTTP/2 ready to boost the load time
It will secure the website speed optimization without much fuss. Also, always look for SSL CDN features to deliver the content faster to the audience. The good thing is that you get the SSL CDN feature built-in in Webflow websites with the hosting. So, it will deliver the webpage and contents to the user from the nearest server with a secure connection.
Conclusion
It is vital to optimize the speed and performance of Webflow websites for ranking higher in search results. It also reduces bounce rates. You should optimize images, work with fonts, and manage the scripts to reduce the burden from the website so it can load faster.
Always remember that the key to a fast-loading website is to keep it simple with a friendly UI. Instead of trying to make the website extravagant, ensure that you choose a practical template from Webflow and work over it. Also, take the help of the speed and performance checker tools to find the lacking and improve them to see the results.

About Flowzai
At Flowzai we craft beautiful, modern and easy to use Webflow templates & UI Kits.

Got A Project In Mind?
Reach out today, and let's make something amazing together.
